C# List
We are going to dig into List. We will look at different ways to define and use a List. We’ll also look into what other things we can do with List.
Overview
In most cases in programming, you would need to work on a set of data.
For example, you are creating a program to compute the grades of students, you don’t want to create a grading system for only one student, instead you want to have it for the entire class or perhaps all the students at the school.
Or in the case of the ordering system, you will not get an order from a single customer but from multiple or all the customers. And customers won’t order a single item but rather multiple items.
Sets of data are typical in applications, consider a set of songs in the Spotify Playlist or a set of pictures in your Facebook album or set of “Stories” in your Instagram highlights.
Because it is typical and common in applications, creating a set of data is a fundamental feature of many programming languages.
What is a List?
List is the most common way to create collections or set of data in C#.
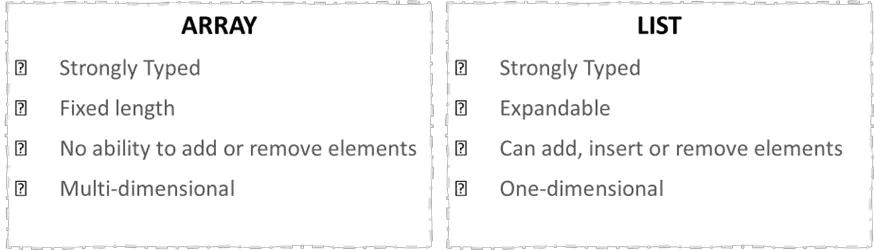
Similar to Array, List is also strongly typed. If you declare a list of double, you can’t give it a value of string.
Each element in the list has a position index. The position index is used to access each element in the list.
The main difference between Array and List is that List is NOT fixed size and is expandable. You don’t have to set its size during declaration and initialization because you can insert or add and remove elements to the list even after declaration. Compared to Array, however, List is only one-dimensional.
🎯 Array vs List
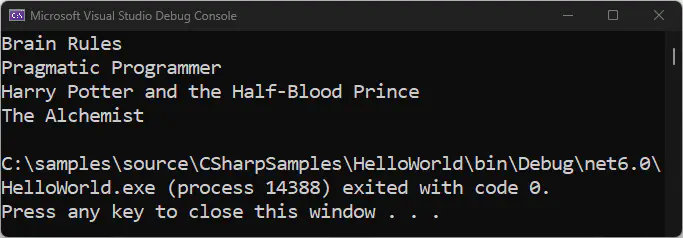
Here is an example of List:
List<string> booktitles;
booktitles = new List<string>(){"Brain Rules", "Pragmatic Programmer",
            "Harry Potter and the Half- Blood Prince", "The Alchemist"};
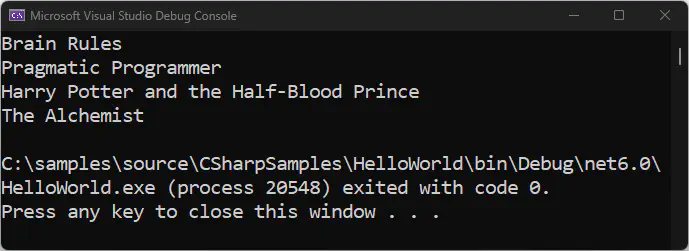
In C#, the index is zero-based meaning that the first element in List has an index number of 0. Consider tje example above, Brain Rules has an index number of 0, Pragmatic Programmer has 1 and so on.
[0] "Brain Rules"
[1] "Pragmatic Programmer"
[2] "Harry Potter and the Half-Blood Prince"
[3] "The Alchemist"
Declaring and Populating a List
When declaring a List the first question you need to ask is what type of data are you going to put in the list. Is it an integer, string, or date?
For our example, if we want to work with a set of books title, then we want a list of string. If we want to work with a set of grades, then we want a list of double.
List is derived from System.Collections.Generics namespace of class library.
Ensure that you have a using directive for this namespace, as in the example below:
using System;
using System.Collections.Generic;

namespace HelloWorld
{
    internal class Program
    {
        static void Main(string[] args)
        {
            List<string> booktitles = new List<string>();
        }
    }
}
Declare a List
To start working with List, you need to declare it.
To declare, we need the keyword List then the type of collection, name of your list and to initialize we use the new keyword, to state that we want to initialize it with a new instance of List.
There are several ways to declare a list in C#:
-
declaration then initialization static void Main(string[] args) { List
bookTitles; //declaration bookTitles = new List (); //initialization } -
declaration + initialization in a single line static void Main(string[] args) { List
bookTitles = new List (); //declaration and initialization } -
using implicit data type
varvaris an implicit data type. It will automatically determine the data type based on the value we stated on the right side of the variable.In this case
varwill automatically be assigned a data type ofList<string>.static void Main(string[] args) { var bookTitles = new List<string>(); //using implicit data type var } -
using collection initializer – with collection initializer we populate a list as we initialize it
  static void Main(string[] args)
  {
      List<string> booktitles = new List<string>(){ "Brain Rules", "Deep Work", "The Spy", "The Code" };
  }
Populate a List
Add Items to the List
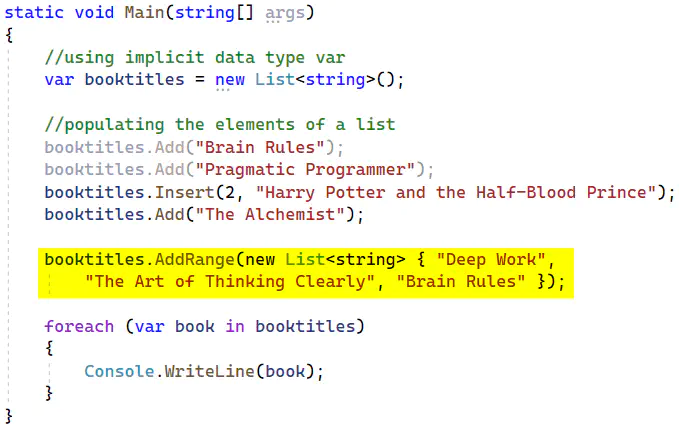
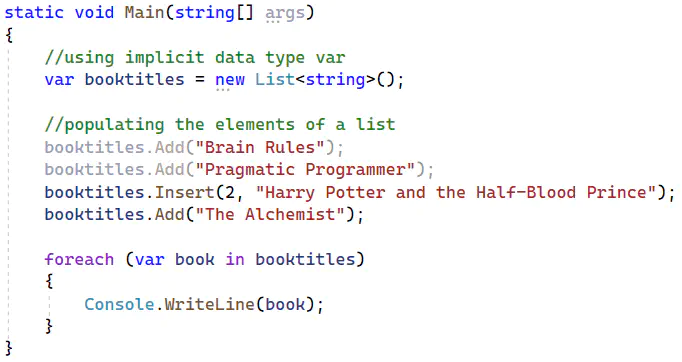
Once the List is declared and initialized, we can populate it by putting elements using the list instance methods Add() and Insert() as in the example below.
Add()is relatively safer and is therefore recommended to use to populate a list if possible as it simply adds an item to the end of the list.
Insert(), however, requires an index which must be valid otherwise it will throw a runtime error.
    static void Main(string[] args)
    {
        List<string> booktitles = new List<string>();

        booktitles.Add("Brain Rules");
        booktitles.Add("Deep Work");
        booktitles.Add("The Spy");
        booktitles.Add("The Code");
        booktitles.Insert(4, "Start with Why");
    }
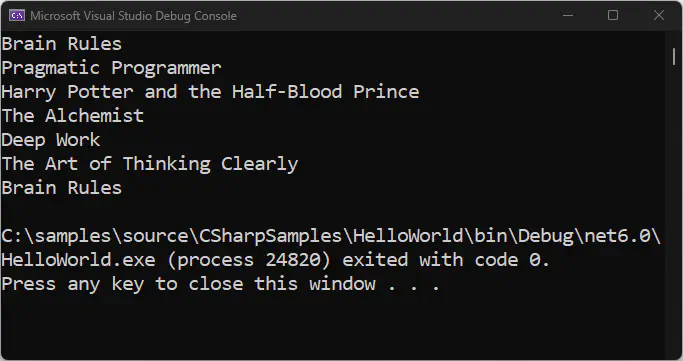
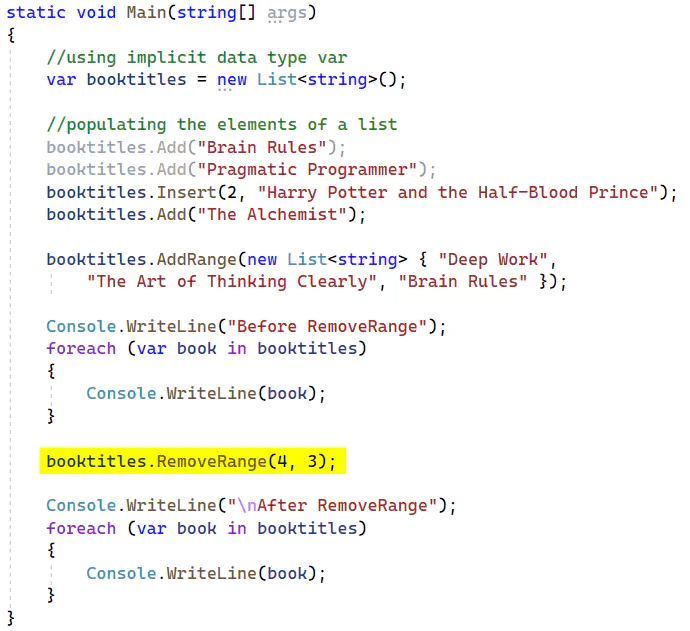
You may also use AddRange() to add a List to another List:
Output:
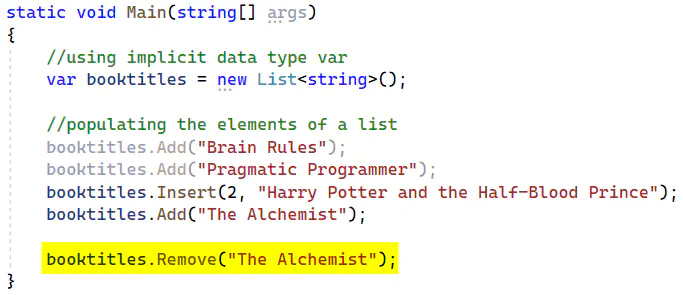
Remove Items from the List
To remove an item on the list, use list instance method Remove():
You can also use RemoveRange() to remove subset of items on the list.
To use RemoveRange() you need supply the position index of the element where the removal will start and how many items will be removed starting from that index.
Example:
Output:

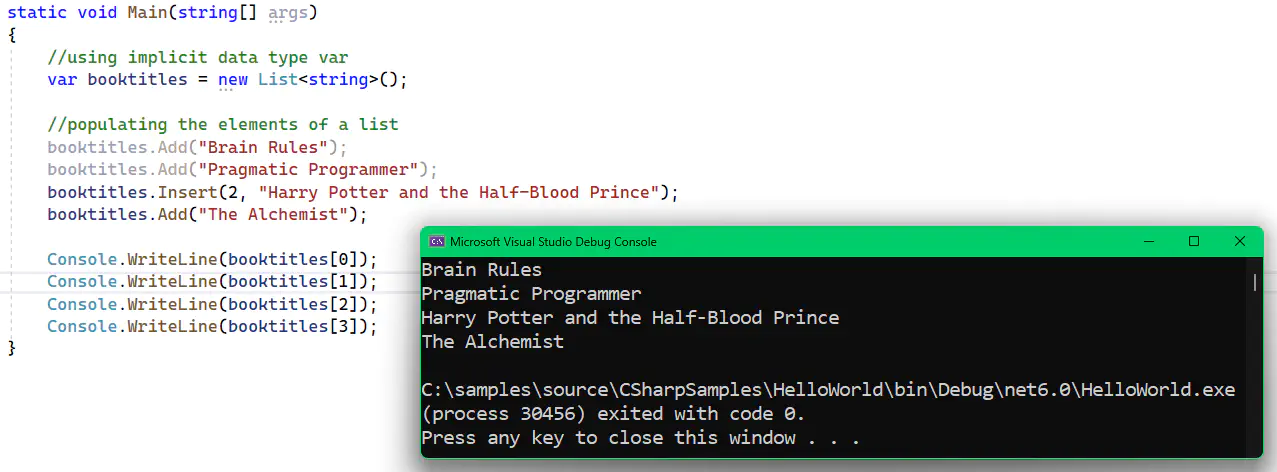
Retrieving an Item from a List
To retrieve an item from a list you may use the position index of that item from the list.
Example:
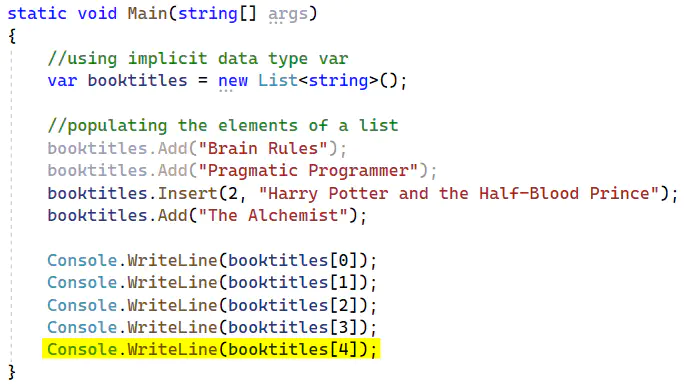
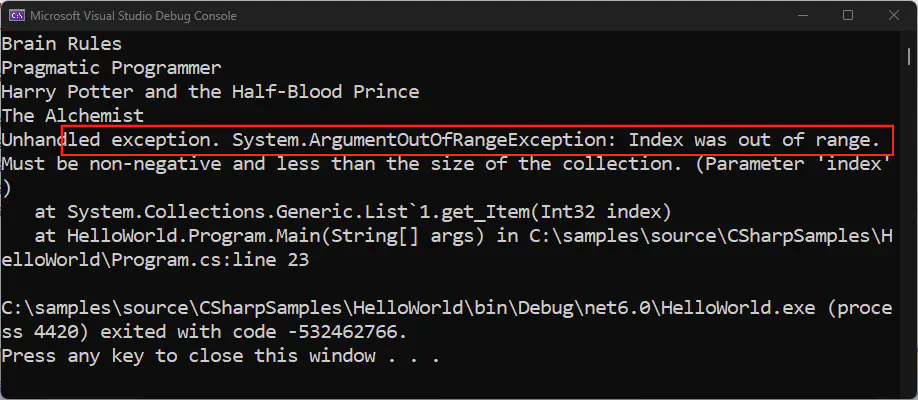
If we try to retrieve an element that is beyond the size of the List or out of range like the example below.
The compiler doesn’t catch it but running the code will throw an error.
Output:
Avoid retrieving elements by index when you need all the elements.
Instead, iterate through the elements using
fororforeach.
Iterating through a List
Oftentimes instead of retrieving the elements individually, you need to iterate through all or some of the elements in a List.
C# provides two ways to iterate over elements in a List – foreach and for.
using foreach
The foreach statement accesses each item or element in the List without the need for manual indexing.
It repeats a group of statements for each element in a List. The elements are processed in index order from index 0 up to the last index.
Here’s an example using foreach:
Output:
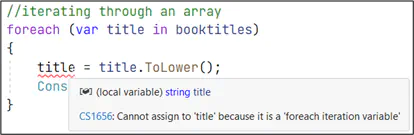
Some important points in using
foreach:
the iteration variable (
varbook) is a read-only local variable that represents the current element in the array.
foreachalso always goes through all of the elements in the list and you need to implement logic if you want to skip some elements.When using
foreach, the element itself is read-only thus cannot be changed. For example, say we want to change each element to lowercase. If we try to change the iteration variable, Visual Studio marks it as an error, cannot assign to color because it is a foreach iteration variable, so we can’t modify the value here. See example below:
using for
The for statement repeats a group of statements while a specific condition is true. It iterates using an integer value and to access list elements we can use that integer value.
Consider the example code below and its output:
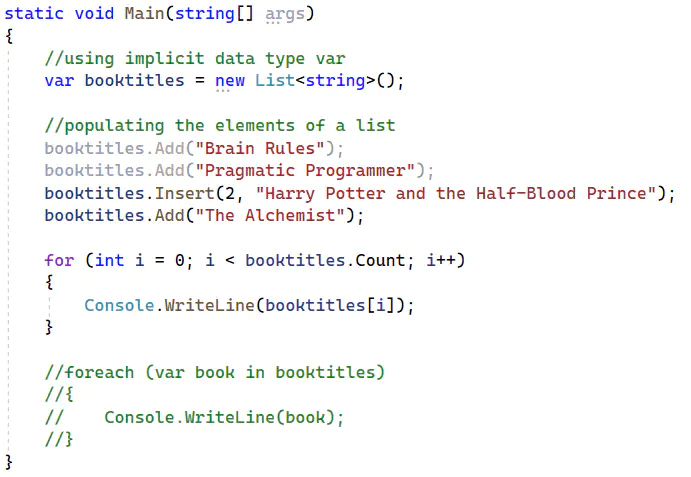
Output:
Inside the for, we change each element to lowercase. We accessed an element using the initializer variable (int i) as an index and we used the ToUpper() string method to change the text to uppercase.
Unlike the foreach, with for, we can change the value of the element within the iteration and we could easily change this code to only process some of the elements. We could change the iteration to begin at 1 or end at 2, for example, or process every other element by incrementing the iterator by 2.
foreach vs for
foreachsyntax is quick and easy and iterates through all the elements in a list whileforsyntax is a little more complex but provides more flexibility in iterating only a subset of elements- The
foreachiteration variable that provides each list element is read-only, so we can’t modify elements as they are iterated. Using theforsyntax, we can modify the elements as needed. - Use
foreachto quickly iterate all of the elements of an list. Useforto iterate a subset of the elements of the array or to modify array elements as they are iterated.
🔚 end of document 🔚